Page 1 - Overview of Building
a Kart
Page 2 - Materials for Go Karts
Page 3 - Go Kart Frame
Page 4 - Go Kart Seat
Page 5 - Go Kart Steering Overview
Page 6 - Go Kart Spindles, Axles
Page 7 - Go Kart Engines, Exhaust
Page 8 - Go Kart Throttle, Brakes
Page 9 - Go Kart Clutch, Sprocket
Page 10 - Go Kart Parts Sources
Page 11 - Our New Site
Design Elements
Take your time designing and making the frame. If you get something wrong there, it will make many more problems down the road. As we suggested, mark our your frame on the driveway with chalk. You'll get a good idea how long the go kart frame needs to be for comfort. The following framing plans are reprints from an old magazine. They show you a general idea of what angles you'll be dealing with, and suggestions like the front bumper. Take the best of these ideas to create your custom design. Remember to include a roll bar.
These particular plans suggest lowering the frame, but you'll lose so much ground clearance that it would have to be an on-road-only kart, and that's not particularly useful unless you've got a lot of open and safe asphalt to drive on.
Here we begin the framing process. We decided not to lower the frame since we want an on and off road kart, and made it wider and longer so it can accommodate two people.
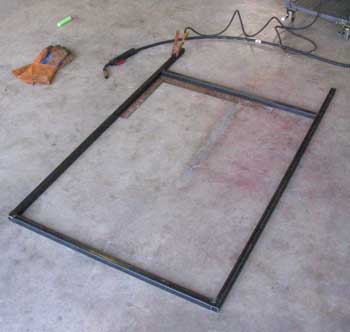
 If you have a truly flat area of concrete to work on, it will make your job of squaring the material easier. When you assemble the frame members, use a square as shown to make your you're getting the proper angles. You may be able to fudge it later, but the frame has to be perfect.
![]() Check frame prices at Northern Tools.
Check frame prices at Northern Tools.